Changing an ADF pickup roller assembly
If your ADF has trouble picking paper, you may want to replace the ADF pickup roller assembly.
See
Ordering HP parts and accessories
to order an ADF pickup roller assembly. To remove the
existing assembly, follow the directions below.
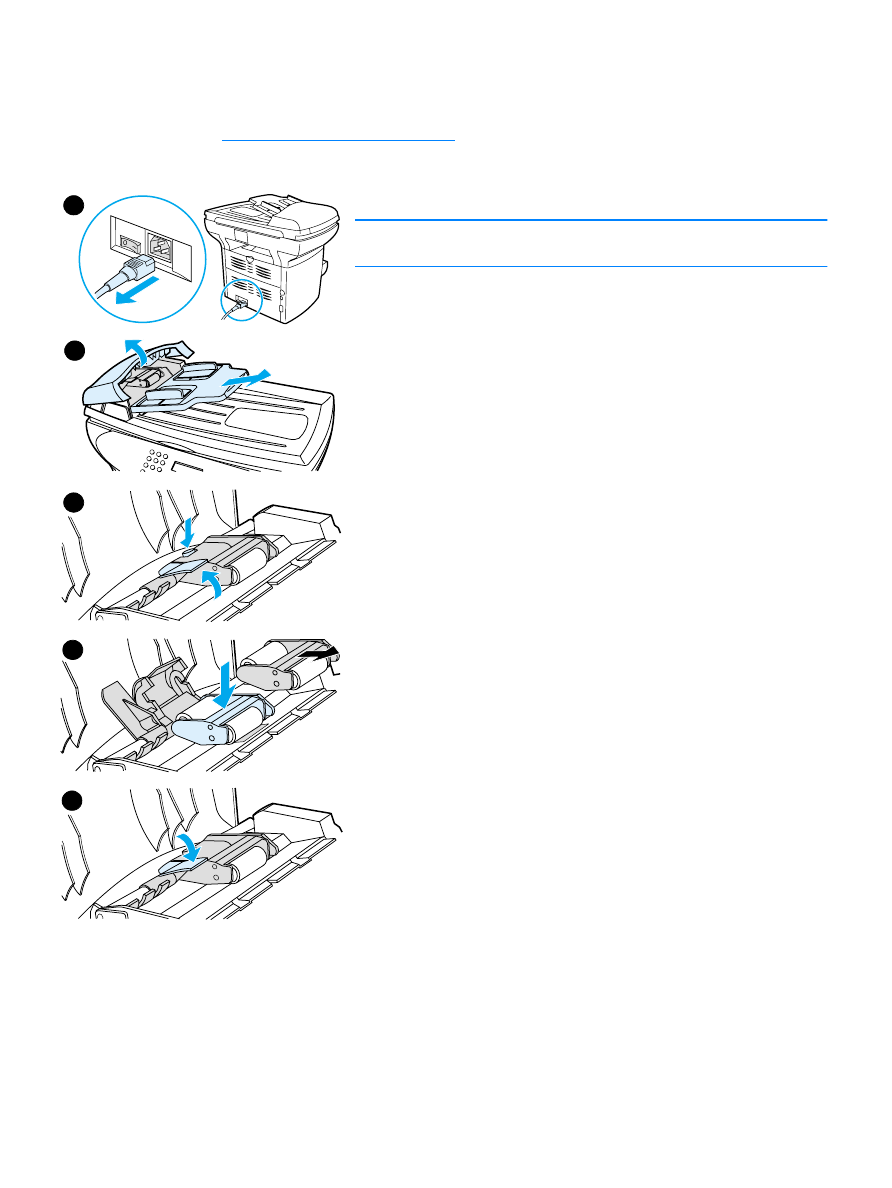
1
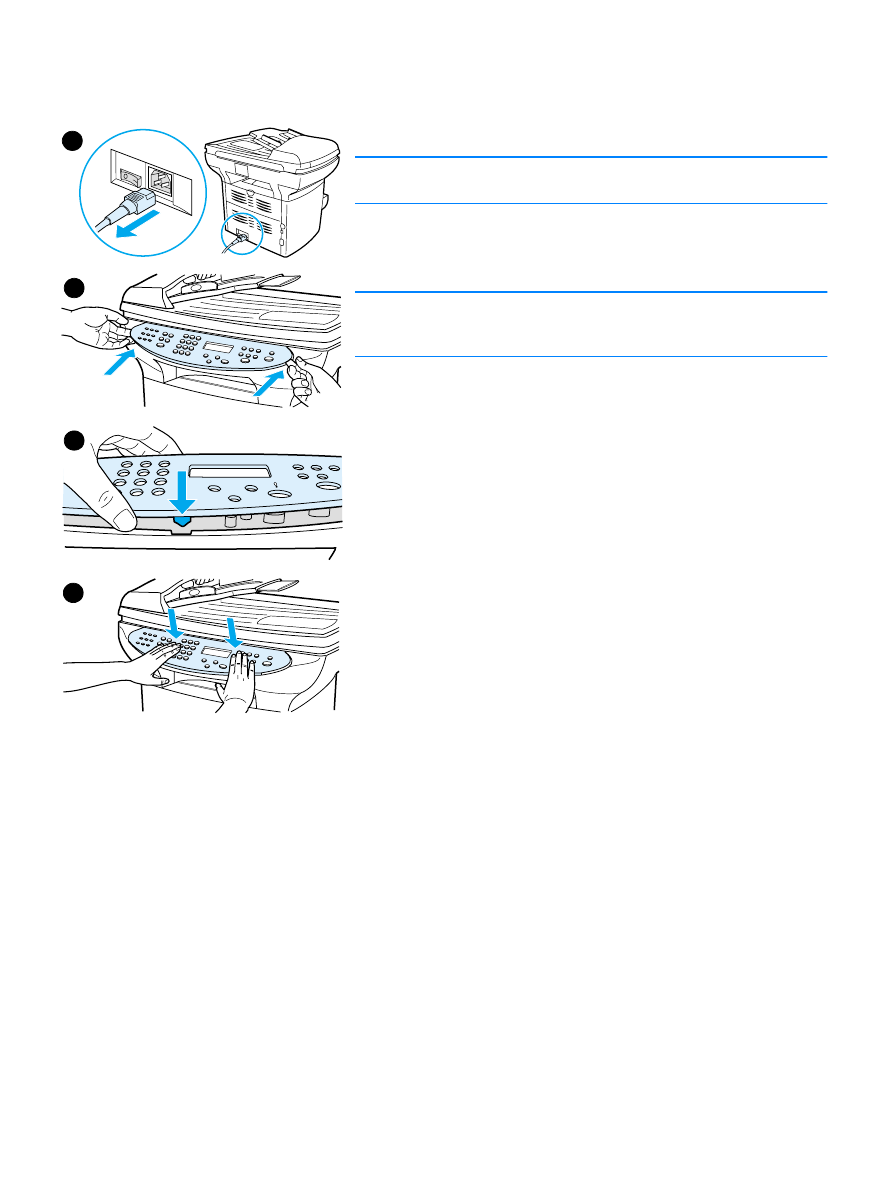
Unplug the power cord from the printer.
Note
If you have a 220V product, turn off the power switch.
2
Remove the input tray and open the ADF cover.
3
Press the round green button while lifting the green lever. Rotate
the green lever until it stops in the open position. The old pickup
roller assembly should remain on the black surface.
4
Remove the old assembly and put the new one in exactly the same
place. The largest roller goes in back, and the gear side will be
away from you.
5
Lower the green lever with the flat green part fitting in between the
rollers. Press down on the green lever until a snap is heard.
1
2
3
4
5
134 9 Cleaning and maintenance
EN
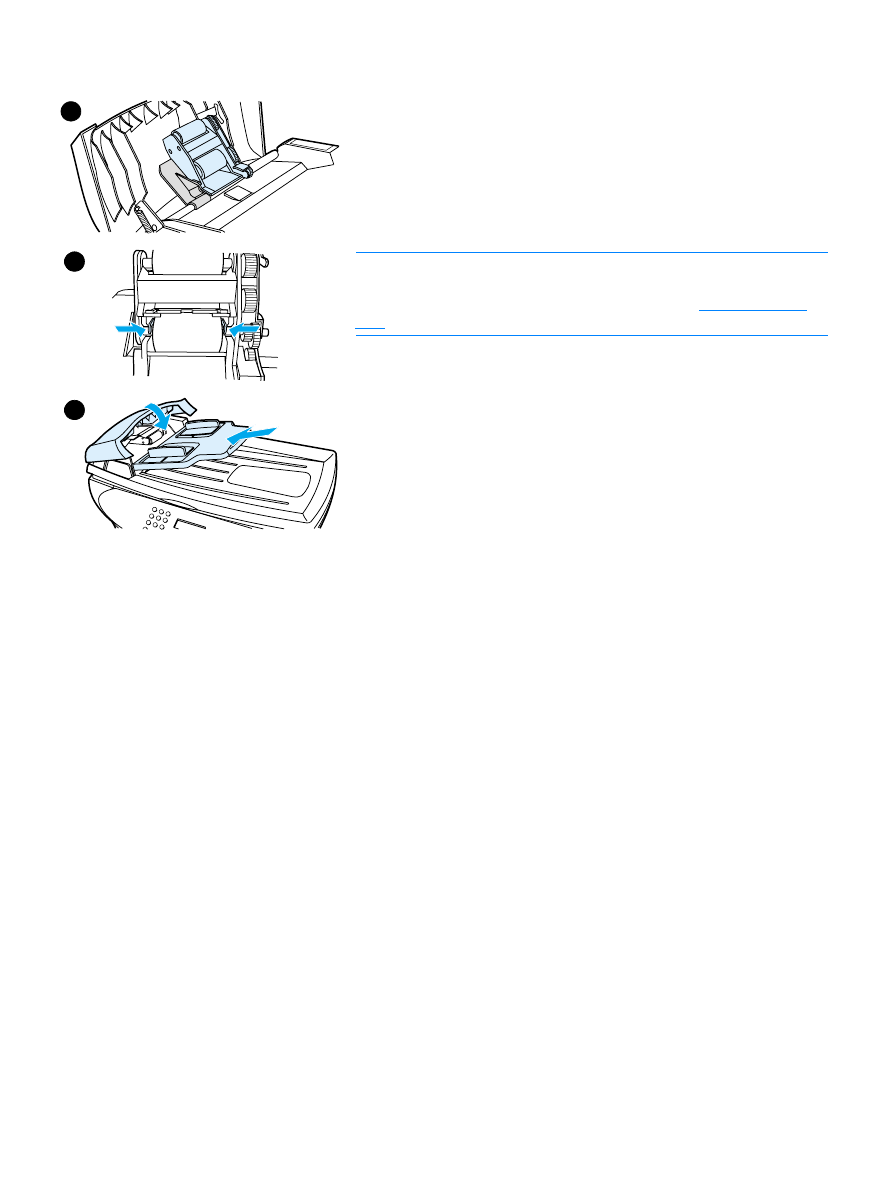
6
To check for proper installation, lift the green lever until it remains
open. The new pickup roller assembly should be secured to the
lever assembly and should not fall out.
7
Make sure that both sides of the assembly are secured by the
green hooks.
8
Lower the green lever assembly and close the ADF lid. Reinstall the
input tray.
Note
If you are experiencing abnormal jams in the ADF, you may want to
order a new ADF, or upgrade the ADF copy lid. See
Installing a new
ADF
.
7
8
6
EN
Removing and replacing the control panel bezel 135