To change the printer separation pad
1
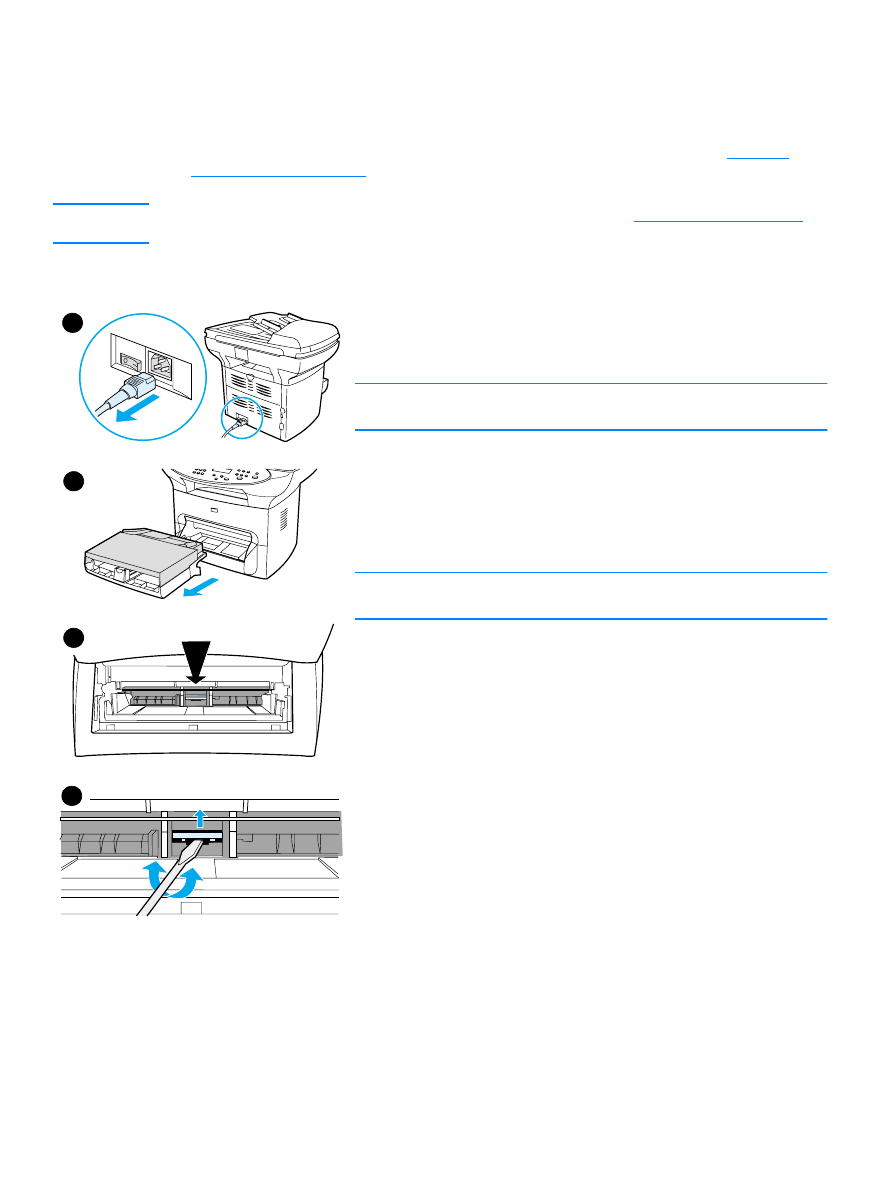
Unplug the power cord from the printer, and allow the printer to
cool.
2
Verify the power is off.
Note
If you have a 220V product, turn off the power switch.
3
Remove the input trays.
4
Find the blue separation pad.
5
To pry the separation pad up from the spring-loaded base, insert a
flat-edged screwdriver in the slot under the separation pad and twist
until the tabs are free.
Note
Touching the black sponge roller may damage the product.
2
4
5
3
130 9 Cleaning and maintenance
EN
6
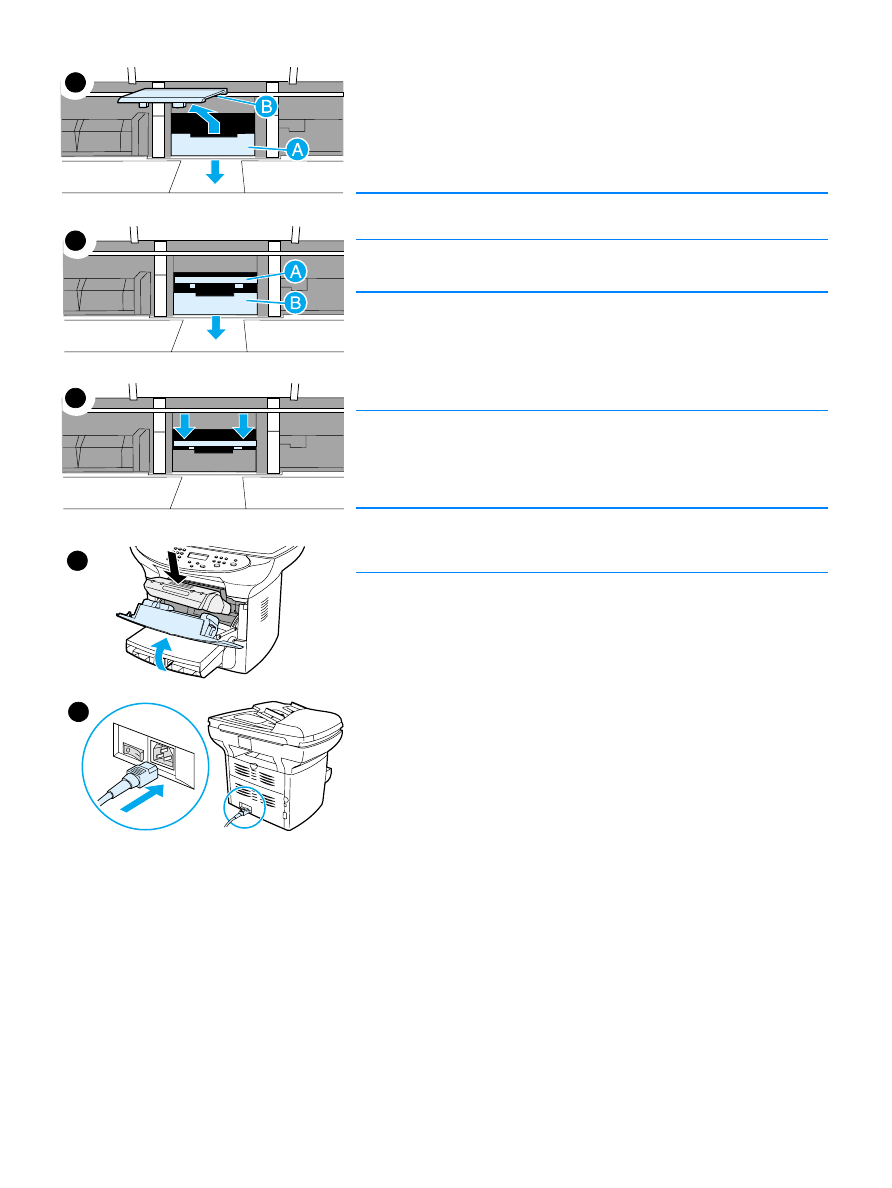
Reach in through the opening, push the spring-loaded base down
(A) with one hand, and pull the separation pad up (B) with the other
hand.
7
With one hand, position the new separation pad in the slot of the
previous separation pad (A). With the other hand, reach through the
input tray opening, and push the spring-loaded base down (B).
Note
The tab on the right is larger to help you position it correctly.
8
Snap both sides of the separation pad firmly into place.
CAUTION
Make sure that the separation pad is straight and that there is no space
between the separation pad and the spring-loaded base. If the
separation pad is not straight or you see space on one side, remove the
separation pad, make sure that the larger tab is on the right, reinsert the
separation pad, and snap both sides into place.
9
Reinsert the input trays.
10 Plug the printer in to turn it back on. If you have a 220V product,
turn on the power switch.
Note
If the pad is not properly positioned, the printer may be noisy or the
paper will not feed at all.
7
8
9
10
6
EN
Installing a new ADF 131