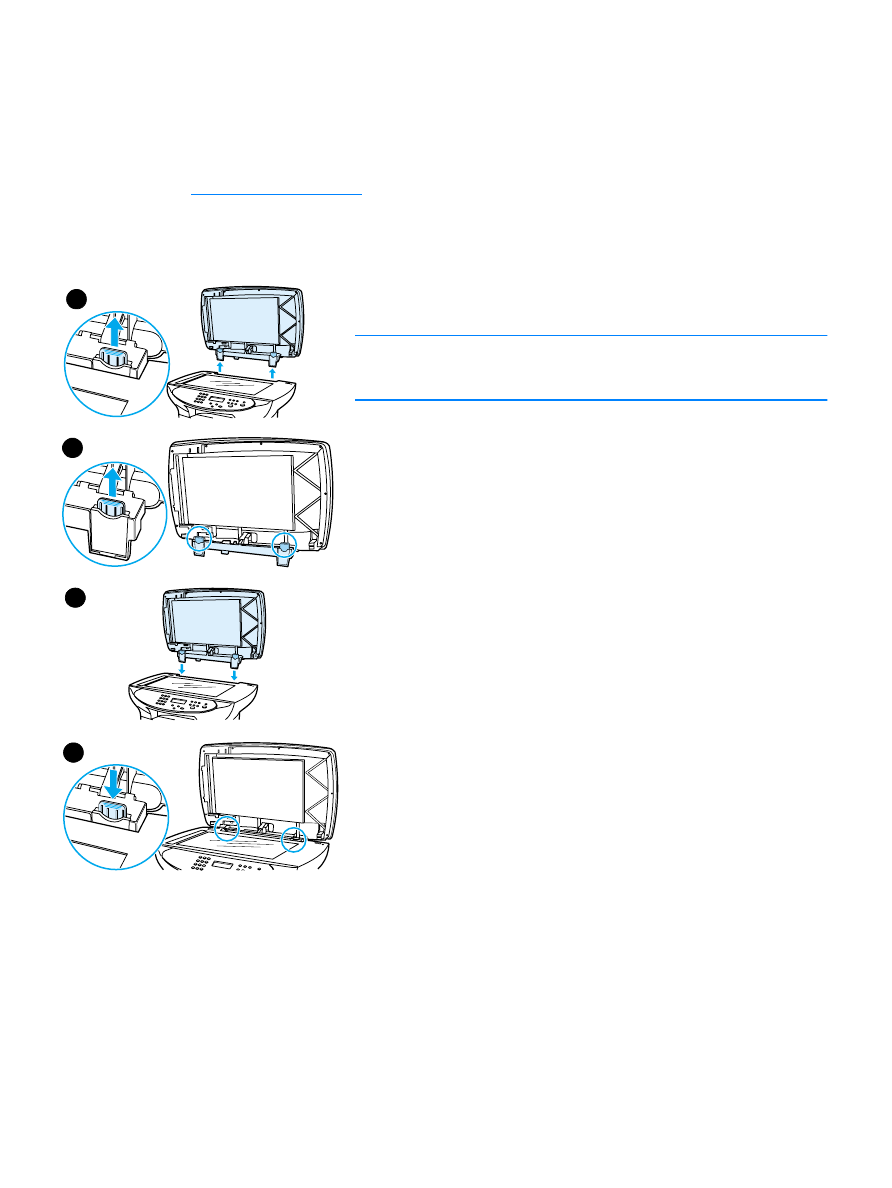
To install a new or replacement ADF
1
Remove the flatbed scanner lid by opening it and gently lifting
straight up.
Note
If you are replacing an existing ADF, you must first pull up both hinge
tabs before lifting the ADF up out of the product.
2
On the new ADF, unfold the hinges and pull up the tab on each
hinge.
3
Install the new ADF by inserting the hinges straight down into the
product.
4
Push down both tabs until they click.
1
2
3
4

132 9 Cleaning and maintenance
EN
5
Gently close the ADF lid.
CAUTION
To avoid damaging the product, do not allow the ADF lid to fall onto the
flatbed scanner. Always close the ADF lid when the product is not in
use.
6
Install the ADF input tray by aligning the two tabs on the input tray
with the two grooves in the ADF lid and sliding the tray into the
grooves until it snaps into place.
6
5
EN
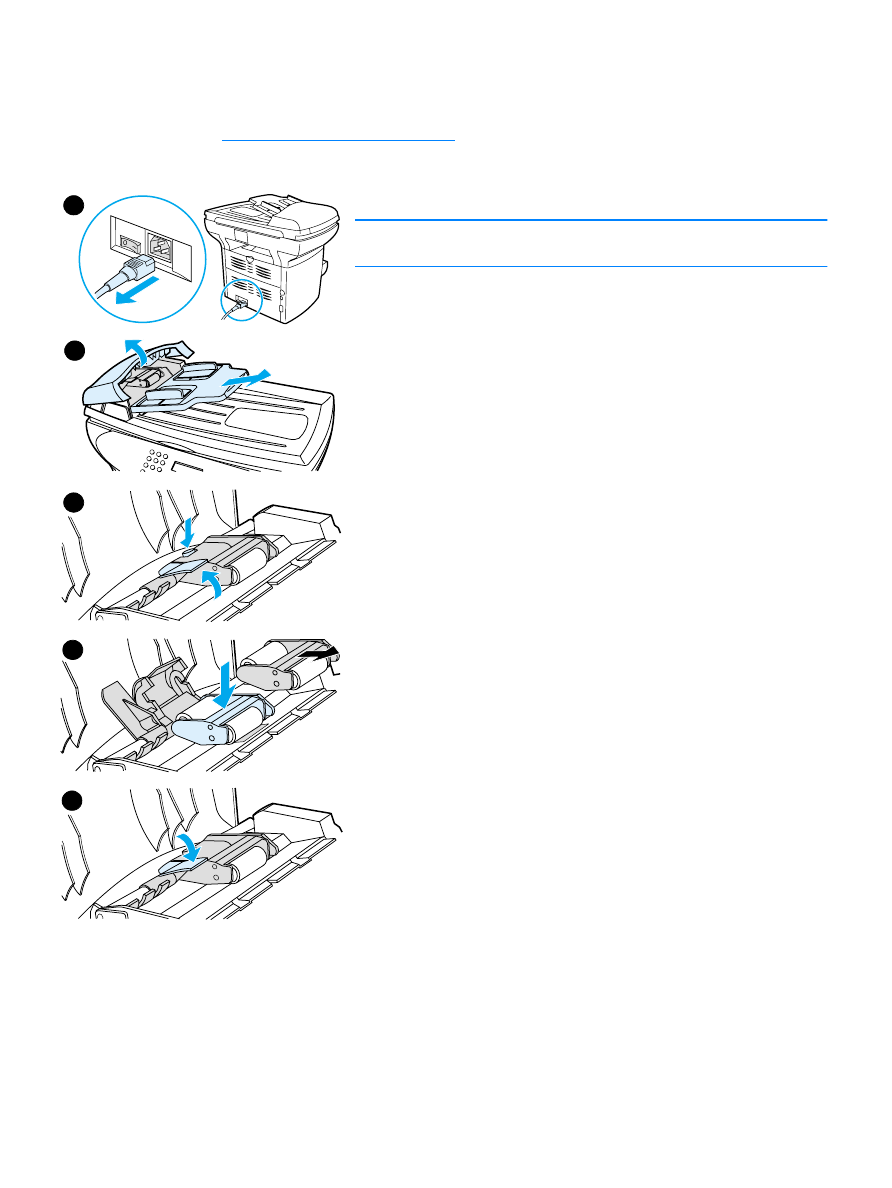
Changing an ADF pickup roller assembly 133