To connect the product to a network
Use the procedure in this section to connect your HP LaserJet 3300
series product to the network using an HP Jetdirect 310x print server.
Note
The instructions below apply to the HP Jetdirect 310x that is included
with the HP LaserJet 3320n. If you are using a different Jetdirect print
server, you must refer to the installation instructions that came with that
print server.
Note
The USB cable should already be connected to the product. (For more
information, see
Connecting a printer cable to your product
.)
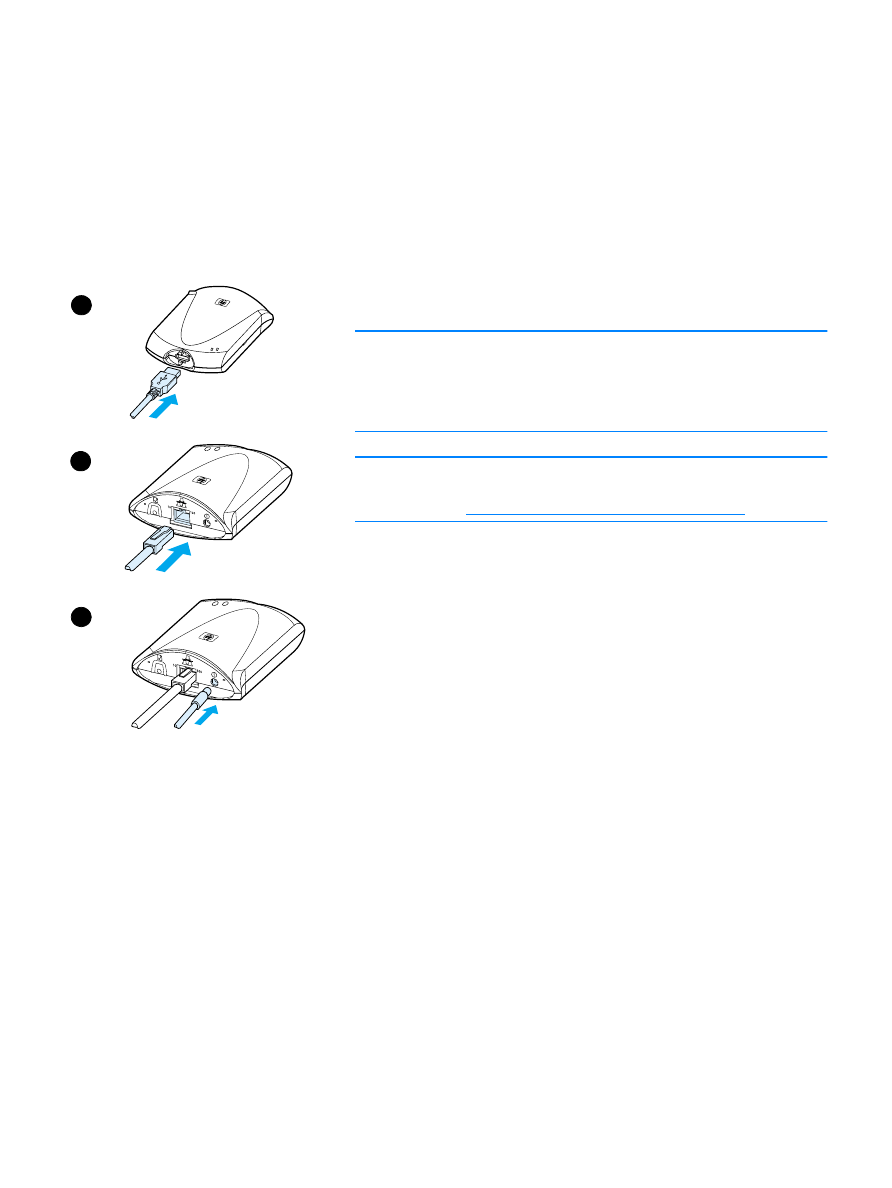
1
Plug the rectangular end of the USB cable, with the USB symbol
facing up, into the USB socket on the front of the print server. Make
sure the cable is fully inserted.
2
Attach the print server to a 10/100Base-Tx local network by
plugging the network cable into the network port on the rear of the
print server.
3
Plug the power module (supplied with the print server) into a power
outlet. Plug the other end of the power module cable into the power
socket on the rear of the print server.
1
2
3
112 8 Networking
EN
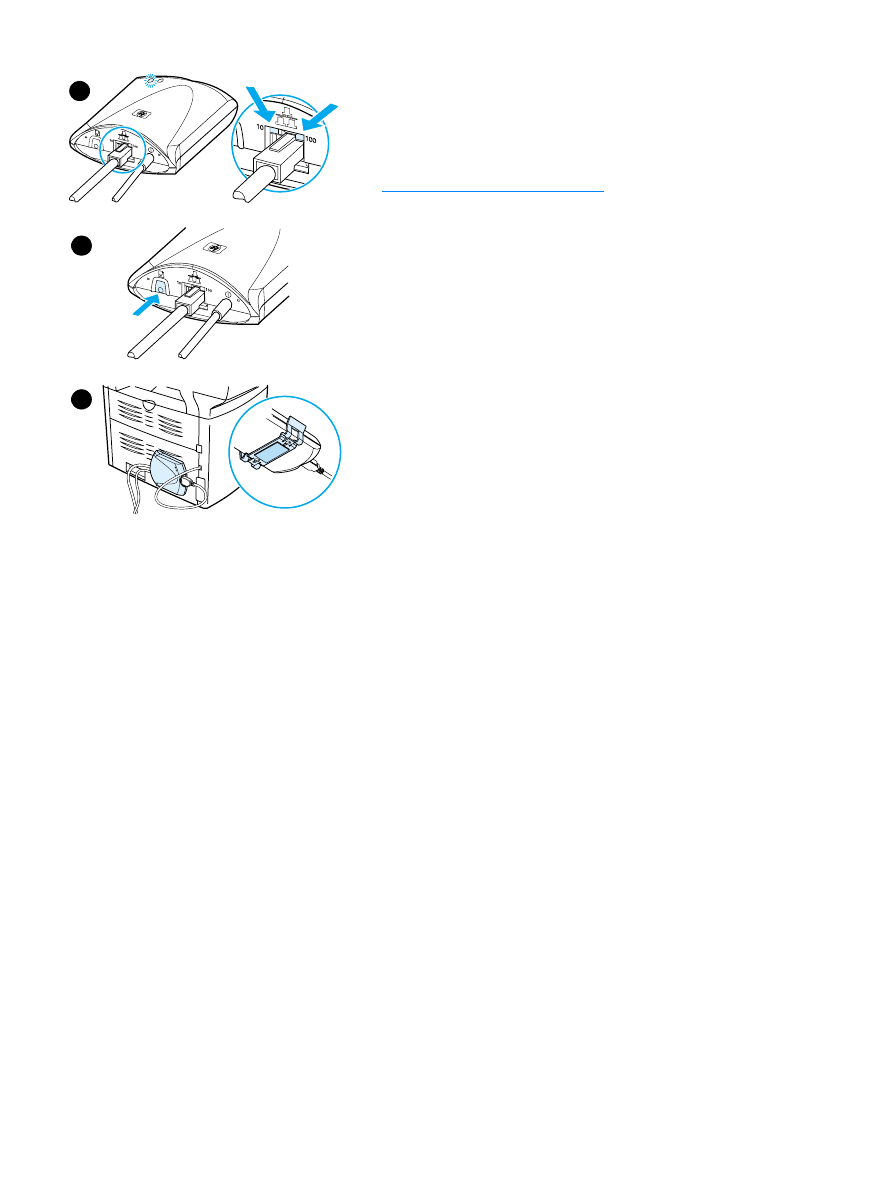
4
The 10 or 100 LED lights, indicating a network connection, and the
power/status LED should begin blinking. After 15 seconds, the
power/status LED should be solid green.
5
Press the test button on the rear of the print server to print a
configuration page. A configuration page should be printed by the
attached printer. If a page does not print or is unreadable, see
Configuration page does not print
.
6
If you want to mount the print server to the product (or table or wall),
secure the attached mounting clip using the supplied sticky tape or
the mounting screw holes. You can use the location illustrated in
image 6 at left.
4
5
6

EN
Installing the network software 113