To connect additional devices
Connect additional devices in the order
shown below. The output for each device is
connected to the input of the next, forming a
chain. If you do not want to connect a device,
skip it and continue to the next device.
1
Unplug the power for all devices you
want to connect.
2
If you have not yet connected your
product to a phone line, see
“Connecting
the product to a phone line” on page 5
before proceeding. The product should
already be connected to a phone jack.
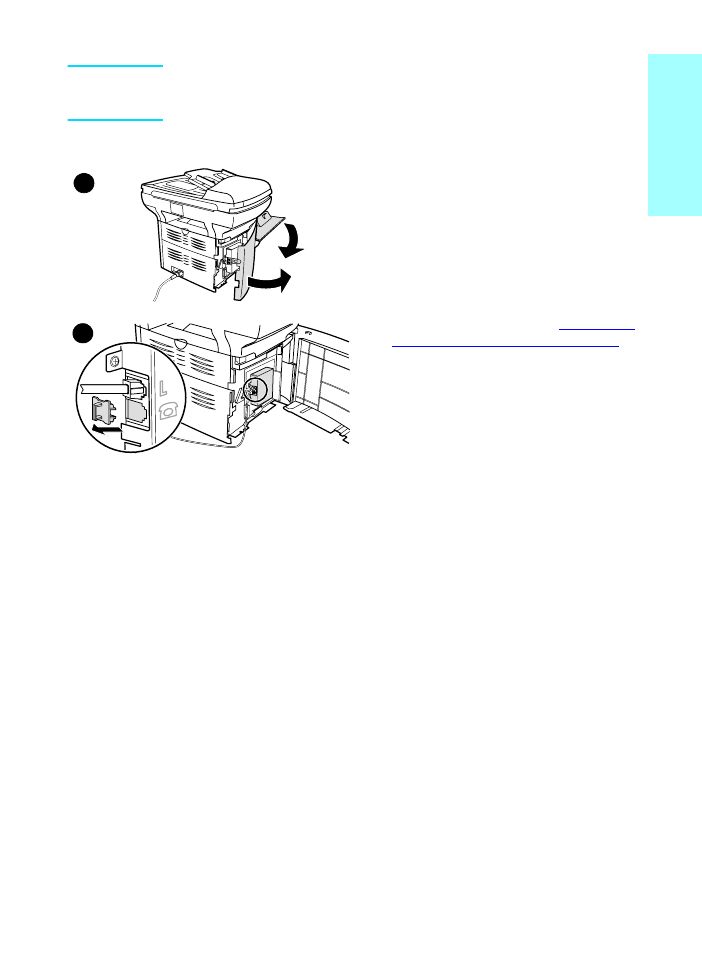
3
Open the print cartridge door and swing
open the left side panel to reveal the
phone line sockets.
4
Remove the plastic insert from the
bottom phone socket inside the left side
panel of the product.
4
3
10 Chapter 1 Setting up
ENXC
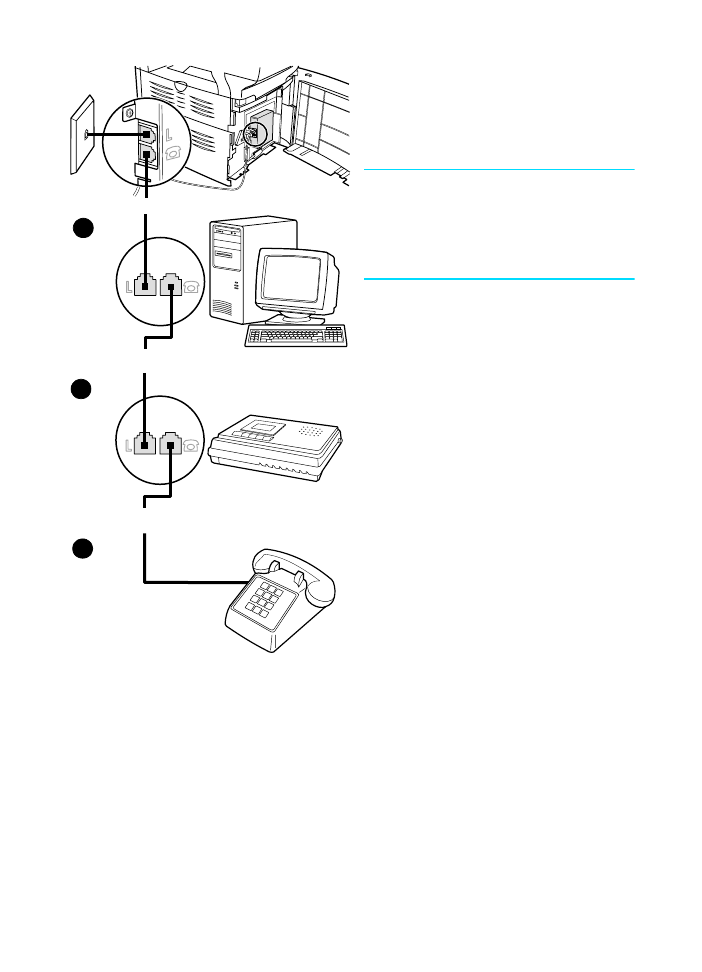
5
To connect an internal or external
modem on a computer, plug one end of a
phone cord into the product’s “phone”
socket (the socket on the bottom). Plug
the other end of the phone cord into the
modem’s “line” socket.
Note
Some modems have a second “line” socket to
connect to a dedicated voice line. If you have
two “line” sockets, check your computer
documentation to make sure you connect to
the correct “line” socket.
6
To connect an answering machine, plug
a phone cord into the previous device’s
“phone” socket. Plug the other end of the
phone cord into the answering machine’s
“line” socket.
7
To connect a phone, plug a phone cord
into the previous device’s “phone”
socket. Plug the other end of the phone
cord into the phone’s “line” socket.
8
After you have finished connecting
additional devices, plug all of the devices
into their power sources.
9
Close the product’s left side panel and
the print cartridge door. When closing
the left side panel, assure that the phone
line is routed through the upper notch in
the panel.
6
7
5

ENXC
Specifying the fax settings 11
Engli
s
h